![]()
Support Notes This support notes are suitable for:
- ABSS Accounting
- ABSS Premier
|
Introduction Invoices and Bills quite often originate from Quotes and Orders that have had deposits applied to them. This support note includes information on how these deposits are refunded when the sale or purchase is cancelled. |
How are deposits recorded and why do they prevent the deletion of Invoices and Bills?
Payments applied to Orders are automatically recorded and posted as deposits. Although these deposits are individual transactions, they become associated with the Invoices and Bills that are converted from Orders. This association prevents the Invoices and Bills from being deleted if the sale or purchase is cancelled. This association also prevents the deposit transaction from being deleted.
How do I know if an Invoice or Bill has had a deposit applied?
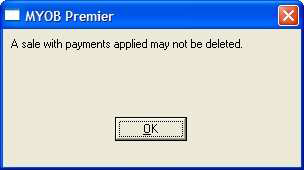
The alert as shown on the following page is displayed when trying to delete an Invoice or Bill that is associated with a deposit.
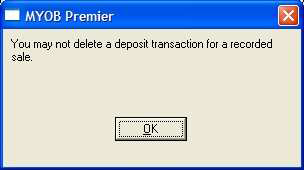
Attempting to delete the payment will result in the alert below.
How do I cancel an Invoice or Bill that has had a deposit applied to it?
There are several steps involved in canceling these Invoices and Bills. Basically, the Invoice / Bill is reversed and the customer or supplier is issued with a refund for the deposit amount.
Step 1 - Set MYOB Security Preference
The ability to reverse or delete transactions is determined by an MYOB Security Preference.
Go to Setup choose Preferences and click the Security tab. Mark the Transactions Can't be Changed; They Must be Reversed [System-wide] option.
Step 2 - Find the Invoice / Bill
Invoices
- Click Sales then Find Transactions.
- Click the Search By field drop down arrow and select Invoice #. Then, click on the adjacent field's drop down arrow and select the Invoice to which the deposit has been applied.
Bills
- Click Purchases then Find Transactions.
- Click the Search By field drop down arrow and select PO # or Supplier Invoice #. Then, click the adjacent field's drop down arrow and select the Bill to which the deposit has been applied.
The window below shows an Invoice and its associated deposit.
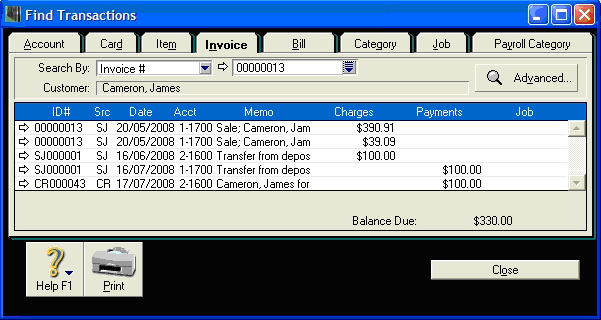
Please note:
- The first two lines represent the Invoice (ID # 00000013).
- The third and fourth lines represent the conversion of the Order to an Invoice (ID # SJO00001).
- The last line represents the deposit (ID # CRO00043).
Step 3 - Reverse the Invoice / Bill
- Click the zoom arrow next to the Invoice / Bill.
- With the Invoice / Bill open, click go to Edit and choose Reverse.
- Check the reversal transaction details then click Record.
Step 4 - Refund the deposit
Sales
- From the Command Centre, click Sales then Sales Register and click the Returns and Credits tab.
- If the invoice is fully paid, highlight the reversed Invoice then click Pay Refund because the money needs to be taken back out of the bank account to which it was deposited. Make sure that the Account selected in the following window is the correct bank account to refund the deposit from.
- If the deposit payment was only partial highlight the reversed Invoice then click Apply to Sale. Change the Credit Amount to be only the amount left owing on the invoice. Then click in the Amount Applied column on the same line where the original invoice appears with the outstanding amount. Then click Record.
- Now highlight the invoice again in Returns & Credits (which will show a Credit Amount equal to the deposit amount) and click Pay Refund. Make sure that the Account selected in the top left of the following window is the correct bank account from which to refund the deposit amount. Click Record. This procedure will totally reverse the sale and the deposit made against it.
Purchases
- From the Command Centre, click Purchases then Purchases Register and click the Returns and Debits tab.
- If the Bill is fully paid, highlight the reversed Bill then click Receive Refund because the money needs to be put back into the bank account from which it was originally paid out. Make sure that the Account selected in the following window is the correct account into which the refund is to be received.
- If the deposit payment was only partial highlight the reversed Bill and then click Apply to Purchase. Change the Debit Amount to be only the amount left owing on the bill. Then click in the Amount Applied column on the same line where the original bill appears with the outstanding amount. Then click Record.
- Now highlight the bill again in Returns & Debits (which will show a Debit Amount equal to the deposit amount) and click on Receive Refund. Ensure that the Account selected in the top left of the following window is the correct bank account into which to refund the deposit amount. Click Record. This procedure will totally reverse the bill and the deposit made against it.
NOTE: If you wish to keep the deposit (in the event the deposit may be non-refundable), then follow the steps below.
For Deposits against Sales:
From the Command Centre, click Enter Sales and create a new invoice for the deposit amount. You can then apply the credit note to this new invoice. For more information see the Support Note on Credit Notes.
For Deposits against Purchases:
1 From the Command Centre, click Enter purchases and create a new bill for the deposit amount. You can then apply the credit note to this new bill. For more information see the Support Note on Credit Notes.
Finance Charges
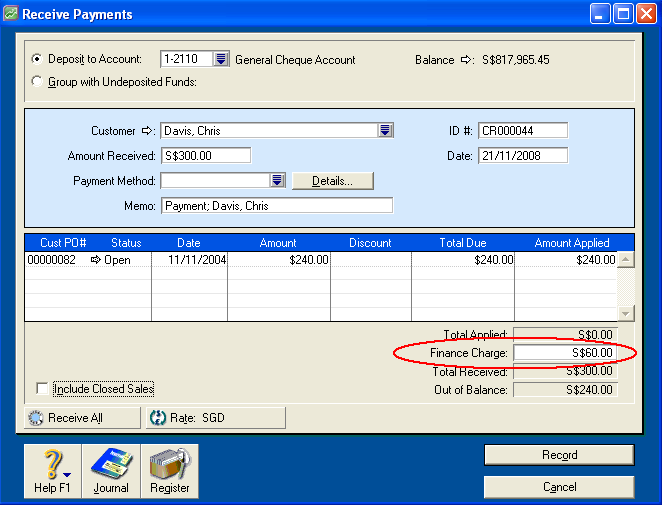
I have received a deposit against an Order and the account was overpaid. I accidentally allocated the overpayment to Finance Charge and have since recorded the transaction as an invoice (see example of this over payment in the window below). How do I remove the Finance Charge?
- Go to the Setup menu and choose Preferences.
- Click the Security tab and mark the Transactions CAN'T be Changed; They Must be Reversed [System — wide] option.
- Using the Transaction Journal, locate the original Invoice or Bill.
- Go to the Edit menu and choose Reverse Sale/Purchase. Record the reversal that MYOB creates.
The next step is to enter a credit note for the amount of the Finance Charge.
For Deposits Received (on Invoices)
- Go to the Sales command centre and select Enter Sales.
- Select the appropriate Customer.
- Click the Layout button and select Service type of invoice.
- Enter the amount of Finance Charge as a negative amount, select the N-T tax code and record the sale. The allocation account will be your linked account for Finance Charges. To check what account this is, go to Setup choose Linked Accounts and click Sales Accounts.
- Go to the Sales command centre and click Sales Register and click the Settle Return & Credits tab.
- Refund both the credit for the original sale as well as the Finance Charge to your bank account. The two credit notes should equal the amount of the original payment.
- As the sale has been refunded, you will need to re-enter the sale and the payment as well.
For Deposits Paid (on Bills)
- Go to the Purchases command centre and select Enter Purchases.
- Select the appropriate Supplier.
- Click the Layout button and select Service type of purchase.
- Enter the amount of Finance Charge as a negative amount, select the N-T tax code and record the purchase. The allocation account will be your linked account for Finance Charges. To check what account this is, go to Setup choose Linked Accounts then click Purchase Accounts.
- Go to the Purchases command centre and click Purchases Register and click the Settle Return & Debits tab.
- Refund both the credit for the original purchase as well as the Finance Charge to your bank account. The two debit notes should equal the amount of the original payment.
- As the purchase has been refunded, you will need to re-enter the purchase and the payment as well.
Comments
0 comments
Please sign in to leave a comment.